Moroccan Spiced Carrot Dip

Standard


Image

Image


Image


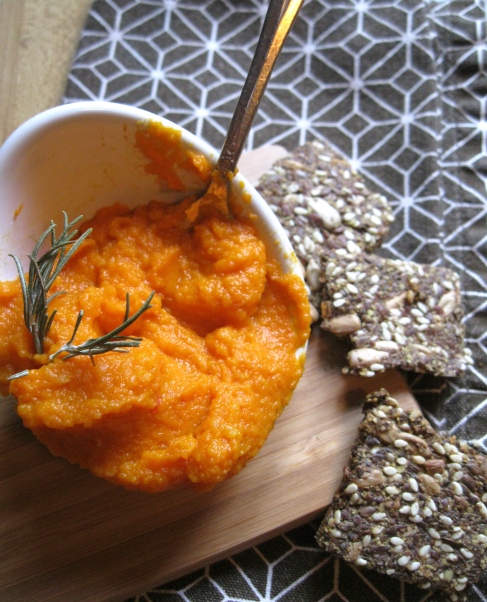
     Move over, hummus, there’s a new dip in town! This smooth and exotically flavorful carrot dip is as versatile as its bean-y cousin. It’s great with crackers (the crackers shown are gluten-free seed crackers based on a recipe from Angela), crudités (my favorite are bell pepper strips!), or used as a zippy and healthy alternative to mayo on a sandwich. It’s vibrant color makes it even more appealing and it would look great with other dips on a party platter, too.
     Okay, I’m not ready to give up my hummus addiction yet, but it’s a new year and I wanted to try something different! Also, in the absence of being ridiculously busy with school or  working a ton, I apparently get pretty bored.  I was really happy with the way this turned out. It’s also lighter in calories and fat than hummus, which is good if you are watching your weight or neglecting to watch how many loaded crackers you’ve stuffed in your mouth.

     Ready to try it out?

Moroccan Spiced Carrot Dip:

~1 lb carrots, peeled sliced, and cooked. I recommend steaming to retain the most vitamins!

~ 2-4 tablespoons cooking liquid reserved

~ 2-3 cloved garlic, coarsely chopped

~ 1/2 teaspoon hot smoked paprika (or substitute sweet)

~ 1/4 teaspoon cinnamon

~ 1/4 teaspoon coriander

~ dash of crushed red pepper flakes (optional)

~ 1 tablespoon lemon juice, preferably fresh

~ 1-2 tablespoons olive oil 

~ sea salt to taste

1. Combine all ingredients in a food processor and process until smooth. Serve cooled or at room temperature.

2. Enjoy!

Chipotle- Cheddar Kale Chips

Standard

Image

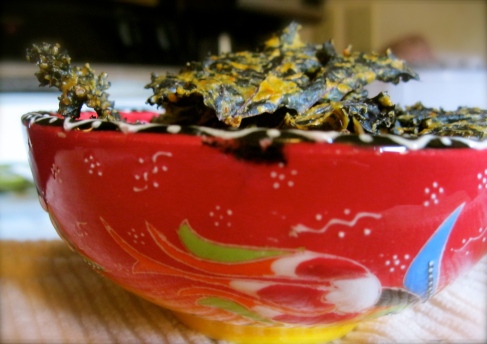
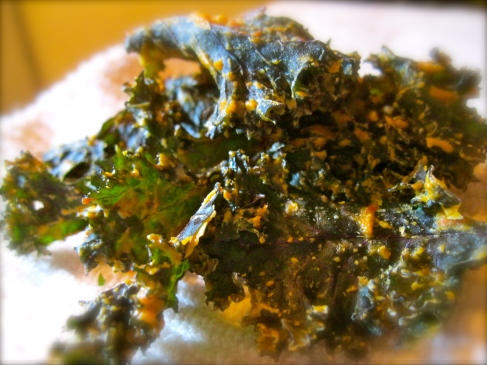
My love for kale chips borders on obsession. It’s probably illegal in most states. I’ve made several version of kale chips including plain salt and olive oil, sour cream and onion, and applewood smoked. These are my favorite yet and I just had to share!
I first started making kale chips in the oven, but after burning  them almost every time I decided to try a dehydrator. What a huge difference it makes! Now I can have kale chips that are crispy and crunchy but never burned, every time. Even when I forget about them and end up cooking them for almost 24 hours. Not only does the dehydrator save energy and preserve nutrients, but it’s also fool proof to use since it “cooks” so slowly that the amount of time doesn’t have to be exact.
But don’t let not having a dehydrator prevent you from trying these out. They are so ridiculously delicious and packed with nutrition that you will want to try them out. Kale haters have been known to fall in love with these chips. I have been known to forget to tell the husband I made these in order to keep them all for myself…

Kale is an excellent source of vitamins A,C, and K as well as a good source of minerals like calcium, iron, and manganese. Additionally, as a member of the Brassica Family (like broccoli, cabbage, and cauliflower), this veggie contains compounds which have been shown to inhibit cancer activity. So what are you waiting for?

Image

Chipotle-Cheddar Kale Chips:

– 1 bunch kale (curly varieties work best for kale chips, but lacinato will work too)

-3/4 cup raw cashews, preferably soaked for at least an hour

-1 chipotle chile in adobo sauce

-1 clove garlic, peeled

– 2 Tablespoons nutritional yeast (helps contribute to “cheesy flavor and is high in B vitamins)

– 1 Tablespoon olive oil

– 1 Tablespoon apple cider vinegar (lemon juice can be substituted)

– 1 teaspoon agave nectar

– scant 1/2 teaspoon sea salt, or to taste

– 1/3 to 1/2 cup water as needed for blending

Directions:

1. Wash and dry kale. Remove the tough stems and tear into bite sized pieces, placing them in a large bowl. There should be able 6-7 cups. It will look much smalled when it is dehydrated though!

2. Combine all other ingredients except water in a high speed blender. Add about 1/4 cup water and blend until smooth, adding more water as needed.

3. Pour the sauce over the kale and mix well. Distribute evenly among the trays of your dehydrator and dehydrate about 10-12 hours. I like to do this over night so I don’t feel like I have to wait so long.  OR you can bake these at about 250F for about an hour, or until crispy.

These can be stored in jars or plastic containers (just not bags- they may crumble) and make a great on-the-go snack. I hope you enjoy them as much as I do!

Predictably Latin-Infused Quinoa Patties

Standard

...


While visiting my awesome sister on her farm in Wisconsin, I made the quinoa patties from Heidi Swanson’s Super Natural Everyday in an effort to both use up some farm fresh, delicious eggs and enjoy one of my favorite nutritional super stars- quinoa! We enjoyed them with minced onion and chives as the recipe called for, but I found myself out of both of these. I do, however, have a surplus of black beans, a plethora of spices, and a giant container of salsa… enter the Latin- Infused Quinoa Patties!

Quinoa-Black Bean Patties:

makes 6

Ingredients:

– 1 cup cooked quinoa

-1/2 cup cooked black beans

-1/4 cup cheese, such as pepper jack, cheddar, or chevre

– 2 eggs, beaten

– 1/4 teaspoon salt

-3/4 teaspoon chipotle chile powder or other chile powder

– 1/2 teaspoon cumin

– 1 tablespoon lime juice

-1/3 to 1/2 cup bread crumbs (can use gluten free or regular)

-1 tablespoon oil (or more, depending on how sticky your pan is)

Directions:

1. Combine quinoa, black beans, salt, spices, lime juice, and cheese. Stir in the beaten eggs, then the bread crumbs. Let rest for 5-10 minutes.

2. Shape the mixture into 6 patties. Heat oil in a large nonstick skillet over medium-high heat, and add the patties , all at once if they fit, or in batches.

3. Cook for 3-4 minutes on each side, or until golden brown and crispy. Top with salsa or your favorite sauce (I’m thinking cilantro pesto would be amazing here) and enjoy!


I am trying to get back into blogging again after a long hiatus. I have still been cooking away over here, just not motivated to write about it with all the other assignments from school pilling up. My break is nearly over and I feel I’m just beginning to recover!

I have been enjoying channeling my creative energies elsewhere, however. My sister and her husband offered me the opportunity to paint a “Dia de los Muertos meets pastoral” themed mural on one of their walls and that has been a lot of fun to work on. It isn’t finished yet (walls take a long time to paint- who knew?) but I will be going back again soon to finish it. If you’re interested in looking at the progress, Erica posted some pictures in her blog here. 

Yesterday I made this little guy as well- Octopus!

...


xo/ Nikita


Cherry Tomato Tart

Standard

…Or “Welcoming fall with an end of summer bounty…”

...

I realize I’ve been M.I.A for the past month… I expected my blog posts would slow down as school started for me, but I certainly intended to keep posting at least weekly. This month has just kept me pretty busy… beginning with visits from my sister the first weekend (so much fun!), making up for those days at work the next weekend (less fun!), camping at Silver Falls (beautiful!), running in the Race for the Cure, school and school related workshops,  and again making up extra work days…

Not to mention our C.S.A. was cancelled due to pests destroying the crops. I was pretty upset about this as it was supposed to go from June to November and only ended up going until August. We were also not given the items we were told we would biweekly such as local eggs and cheese after the first month. Of course you pay for these ahead of time and cannot get a refund, so this was a big financial loss for us. We had budgeted for our grocery bills to be lower after that initial investment and it’s been tough to stick to the numbers we should be. So we’ve been eating a lot of beans… And I’m all about frugal cooking but it’s not as fun to share when every meal is focused on cheap rather than achieving it’s full potential.

Additionally, I’ve been channeling my creative energy previously being used for cooking into other ventures… namely painting, ink drawing, and jewelry making. I have even replaced a good portion of my blog reading with Etsy ogling… If it weren’t for my time commitments at work and school, I’d gladly make time for both creative cooking and art making, but I just don’t have that much time in my day!

For some reason I have  had tarts on my mind the last few days… I was thinking of making some with the fresh figs I bought, but have been eating so many fresh that I may run out. While trying to decide what to make for dinner, I decided to use the plethora of tomatoes available to us…

...

These cherry tomatoes are from our neighbor. He is growing more than he can eat and we are helping as best we can! Real tomatoes are truly divine… I can eat them like candy. They are sweet and juicy and taste like.. well, a tomato.  During the winter, I hate fresh tomatoes- those mealy and bland imposters don’t fool me.  I only buy them because Andrew likes them, but otherwise I simply use canned tomatoes for my winter cooking.

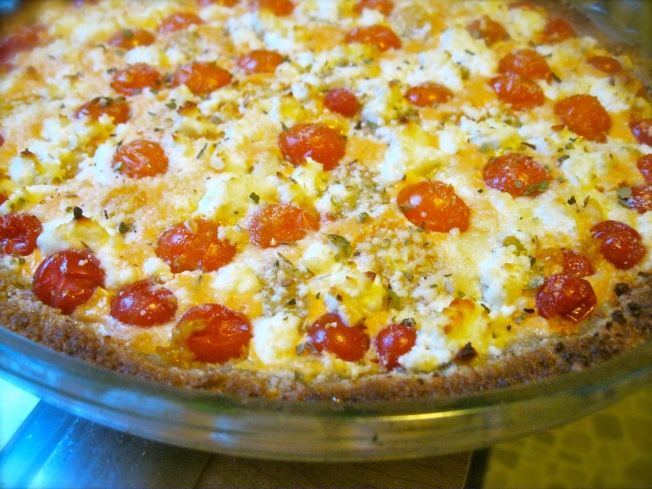
Anyhow, I thought it would be yummy to try a savory tart with cherry tomatoes. And I am sooo glad I did… Why do I always forget how delicious savory pastries are? I love that they provide the visual appeal of a dessert, while being filling and nourishing enough for a main course.

This tart is made with a gluten free crust, which I found to be quite rich and delicious, but you can substitute your favorite pie crust if you want. I used ground sunflower seeds as an adaptation of a crust recipe made with almond flour because they are much cheaper and work just as well in most recipes.

...

Cherry Tomato Tart:

adapted from Marla

Crust:

*1.5 cups ground almonds, sunflower seeds, or a combination of both

*1/2 teaspoon sea salt

*1/4 cup olive oil

*1 tablespoon water

*fresh or dried herbs if desired such as basil, rosemary, oregano, or thyme (I used rosemary and oregano)

Filling:

*1 cup cottage cheese (I used fat free)

*1 egg

*1 large clove garlic

*herbs as desired

*1/4 teaspoon salt

*1/4 teaspoon smoked paprika

Topping:

*1-2 cups cherry tomatoes

*2 ounces goat cheese (or try fresh mozzarella, feta, or even cheddar)

*2 tablespoons parmesan

Directions:

1.)Preheat oven to 350F. Combine ingredients for crust and mix until well combined. Press mixture into a 9 inch tart shell or pie pan. Bake for about 10 minutes and let cool while you prepare the filling.

2.) Combine filling ingredients in food processor or use an immersion blender like I did.  You could also use ricotta instead of cottage cheese and mince the garlic and get away without blending it at all. Spread this mixture onto prepared tart shell and top with tomatoes in a pretty pattern. Sprinkle on the cheese and bake for about 25-30 minutes. You may wish to broil for a minute at the end to brown the cheese also.

Add a salad for a well rounded meal!

xo/Nikita

Packing Lunches Like a Pro and “Yumm Sauce” Recipe

Standard

Happy September! With school in full swing for some and just around the corner for others, I wanted to talk about how to pack healthy and energy sustaining lunches like a pro! But first…

I’m excited for two reasons today. The first reason is simply that it’s September. I didn’t think I’d ever say such a thing, but I’m over summer. Fall is the best time of the year and I can’t wait to enjoy all the colors, smells, tastes, and crisp breezes that go with it. My favorite things to cook are usually “fall” themed. My favorite things to wear are usually “fall” colored. And who doesn’t love Halloween?

The second reason I am excited is that my sister is coming to Portland for the holiday weekend! She arrives this evening. It will be her first time in Portland and she only has a few days so I plan on staying pretty busy!

Anyhow, the topic of this post is not actually me gleefully rambling about how much I love fall and my sister and when my sister comes to visit me in the fall (although, if you didn’t pick up on it, I do love all those things 🙂 ). The topic I wanted to cover is how to pack a killer lunch.

I started school Monday, which means I will be eating even more lunches away from home. I already pack lunches for work of course and I also pack lunches for Andrew. It may sound old fashioned and anti-feminist, but I prefer him to eat healthy food to fast food and its cheaper, which saves both of us money in the long run. So really it’s partly because I’m sweet and partly because I’m selfish :).

Lunches get packed the night before, during or immediately after dinner.  I hate packing a lunch in the morning because it uses up my precious little time!

An on-the-go lunch has to be portable, should be nutritious and filling enough to keep me full 3-4 hours without being “stuffed” and sleepy, and should be delicious because if I’m at school or work all day, I need as many things to look forward to as possible. I almost always employ leftovers from dinner and also frequently make things specifically for easy lunch making such as hummus, cooked grains like quinoa to make my salads filling, and for Andrew I make egg salad.

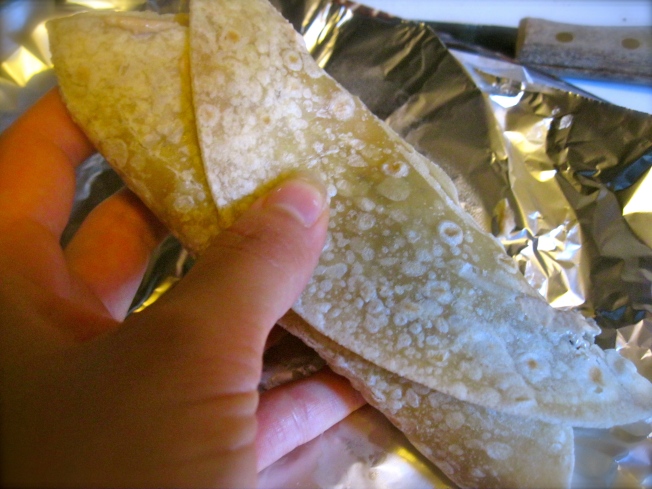
For work, since I bike and want to keep my bag as light as possible, wraps are super handy.
...

The keys to a sturdy wrap: put a little sauce or spread such as hummus on the edge to help it seal and stay put. Wrap up, then fold the edges in by pushing them into the wrap. I like to use foil because it keeps everything from falling out in case my wrapping job wasn’t very successful!

Hummus, lettuce, tomato, cucumber, chevre, with drizzle of my knock-off "yumm" sauce

Wraps full of veggies might get a side of portable fruit such as an orange or apple or maybe some of these delicious cherries packed in a pyrex:

...

But some wraps might be on the sweeter side, such as this guy filled with cookie dough dip and banana:

...

This one would logically get a side of veggies, with perhaps a dressing, hummus, or yumm sauce to dip.

...

Truth be told, wraps may be handy and super portable, but I prefer ginormous salads for lunch. My lunch salads most often consist of:

1. A bed of greens (spinach, arugula, the awesome mix that my CSA has been delivering)

2. Leftovers from dinner (favorite choices are roasted or grilled veggies, stir-fried veggies, cooked quinoa or brown rice, cooked and cubed tofu or tempeh, falafel, or taco fixings)

3. A good protein if not included in the leftovers (garbanzo beans, sprouted lentils, cottage cheese, tofu, almonds, chevre)

4. A good dressing such a tahini-miso, balsamic, yumm sauce, or a generous amount of salsa
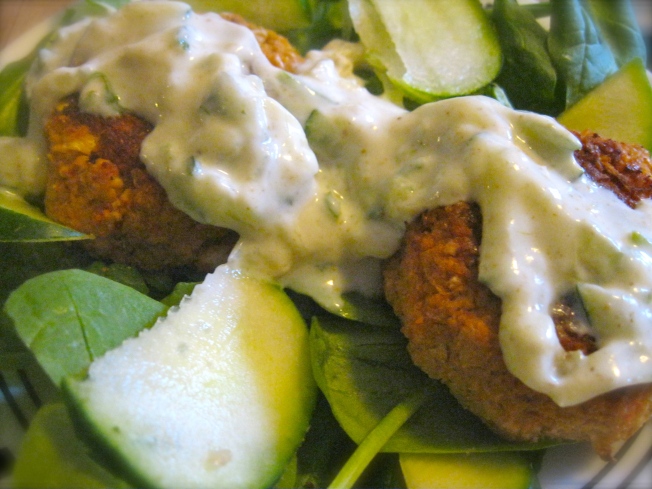
Falafel Salad! Falafel patties with cucumber and tzaziki sauce on a bed of spinach

Here’s one packed in a pyrex for work consisting of leftovers from an Asian inspired quinoa salad with shredded carrots and cabbage in a sesame dressing that has been topped with sliced snow peas:
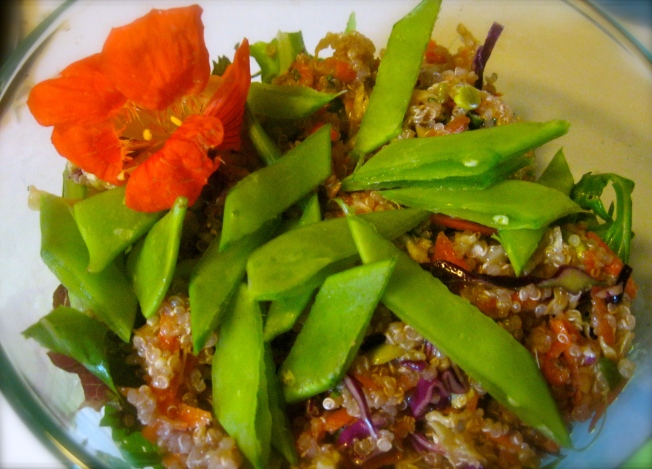
(The flowers come in my CSA salad mix and are edible!)

This one was a home lunch in which I made my own version of a “Yumm Bowl” like they serve at Cafe Yumm by topping some greens with quinoa and garbanzos as well as cucumber slices and tomato and drizzling with “Yumm Sauce.”

...plus some minced red chile for those who like it hot!

Are you curious about this Yumm Sauce that I am obsessed with as of late? I just happen to have an Andrew approved recipe for you! My first try was good, but not great. The second try was terrific!
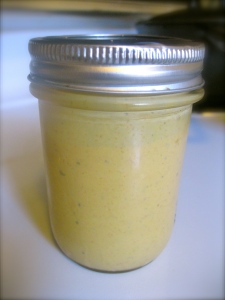
...

“Yumm Sauce” Knock- off:

(which is actually a knock-off of another imitation yumm sauce by Mama Pea)

*1/4 cup cashews (you can also use almonds as Mama Pea does but I think cashews make the creamiest sauces)

*1/4 cup garbanzos

*1/4 cup canola or other mild vegetable oil

*1/4 cup water

*1/4 cup nutritional yeast

*1 large garlic clove, chopped roughly

*2.5 tablespoons lemon juice

*3/4 teaspoon curry powder

*1/2 teaspoon smoked paprika (not a part of the original recipe flavors, but I found it to be a welcome addition)

*1/2 teaspoon dried oregano

*1/4-1/2 teaspoon sea salt

Directions:

Combine first four ingredients in blender and blend until smooth. Then add everything else and blend some more. That’s it! Now scrape it into a container and get ready to put it on everything you make.

It will keep in the fridge 7-10 days.

What are you favorite portable lunches? Do you pack a lunch for yourself, your spouse, or your kids?

“Ode to Oregon” Blackberry and Hazelnut Cake

Standard

...

...

...

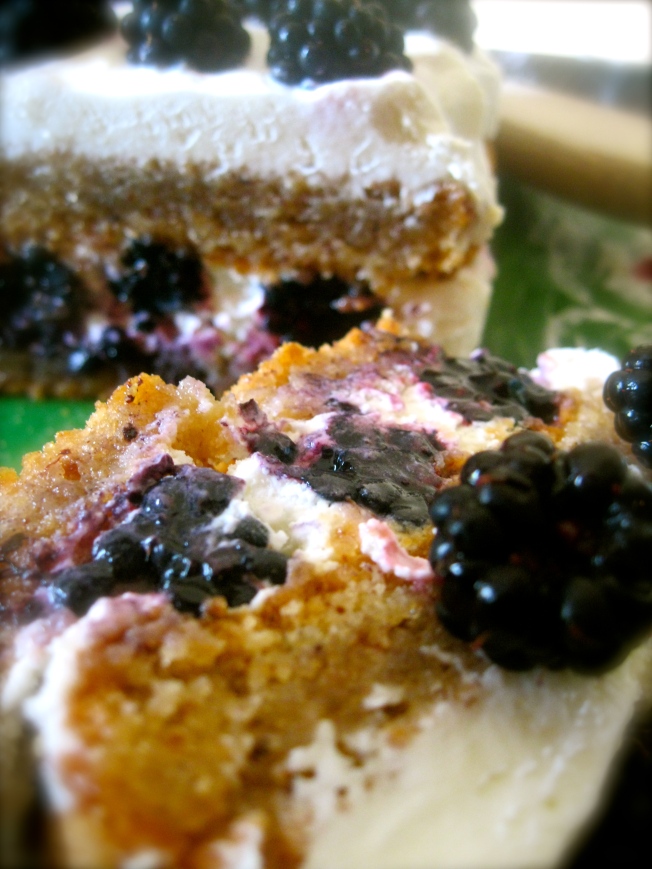
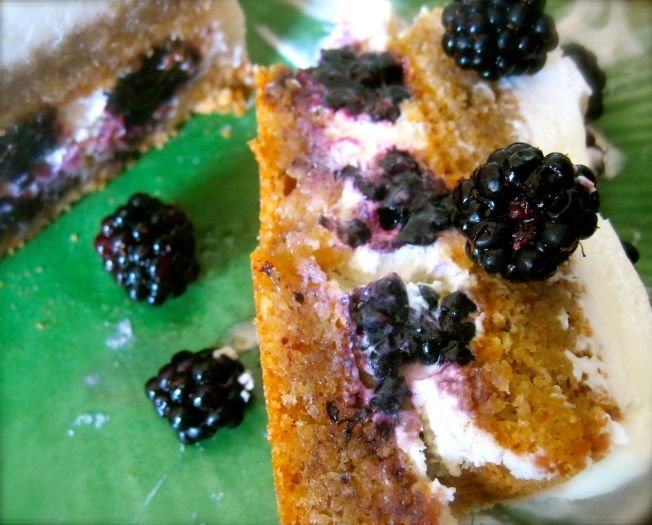
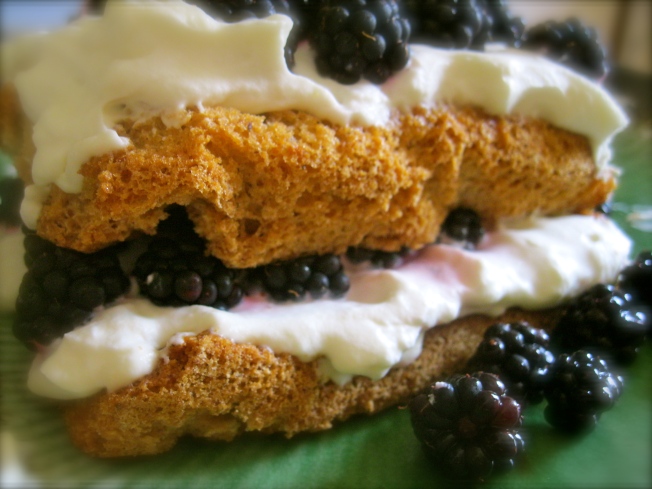
Andrew and I celebrated our 2 year “Oregoniversary” this week with a night out in downtown Portland dinner at Cafe Yumm and cocktails at The Original. (Psst, for locals and Yumm Sauce addicts- I just made a Yumm Sauce knock off and will share the recipe soon if Andrew approves it! ) We also celebrated with  this decadent tasting cake containing two of Oregon’s most abundant edibles : blackberries and hazelnuts.  I regretted turning on the oven for the rest of the evening, but the cake really was divine…
Our four day road trip from Illinois to Oregon was one of the most exciting adventures I’ve had, despite dreading it initially (I hate driving). It’s amazing to look back and see how much we have accomplished and how much has changed since we made that blind leap of faith. Honestly, I don’t know if I would make such a leap where I am in my life now. But two years ago I was a little younger, a little more desperate, and sporting some rosy, heart shaped lenses that made anything Andrew wanted to do seem like the best choice for me, too. I would have followed him anywhere. Really. I’m lucky he picked Portland 🙂
Anyway… that’s enough nostalgia for now! Wanna know how I made this gluten-free, reduced sugar, little gem?
Even though I used blackberries and hazelnuts, you could make this with lots of other combinations if these aren’t readily available to you. Cherry-Almond? Peach-Almond? Strawberry-Pistachio? The possiblities are endless.

Blackberry-Hazelnut Meringue Cake 

*4 egg whites

*1 cup raw hazelnuts

*1 cup sugar (or use 2/3 cup sugar and 1/3 cup stevia baking mix like I did)

*pinch of salt

*1 cup fresh blackberries

*3/4 cup whipping cream

*1/2 cup greek yogurt

Directions:

1.) Toast hazelnuts in 350F oven for about 15 minutes, shaking pan every few minutes to ensure even cooking. This will make your house smell amazing by the way! Remove from the oven when fragrant and golden brown, transfer to a dish towel and rub vigorously to remove the skins. Don’t fuss if there are a few remaining, but do try to get most off. Let cool, then grind to a powder in a food processor or coffee grinder.

2.) Turn oven down to 300F and line to pans of equal size with parchment paper (I did two loaf pans, because that it the only size pan I have two of, but the original recipe used two 9 inch pie tins). Make your meringue by beating the egg whites and salt until stiff peaks form (you will probably need an electric beater unless you have crazy strong and fast arms). Beat in two tablespoons of the sugar and then fold the rest of the sugar in, two tablespoons at a time. Fold in the ground hazelnuts.

3.) Divide mixture evenly between prepared pans and bake for about 1 hour and 15 minutes, covering with foil if it browns too quickly. Let cool completely on wire racks before assembling cake.

4.) Meanwhile you can prepare the whipped filling by beating the whipping cream (again, bust out that electric mixer for this job) until thick and fluffy. Mix in the greek yogurt by hand and add a touch of sweetener if desired (I used stevia). If you don’t have greek yogurt, do NOT use regular yogurt- it will be too runny. You can use all whipping cream (1 1/4 cups) also, I used greek yogurt for the health benefits and slight tang it imparts.

5.) When cake is cool, lay one slice on a large plate and generously frost, then dot with berries. Lay the other half on top and frost and top with more berries. Isn’t it pretty? You can eat it now and it will be delicious, but it will be prettier, tastier, and much easier to cut if you let it sit a few hours or overnight in the fridge.

This cake was amazing, but I think if I made it again I would use hazelnut macaroon cookies for the crust and layer it like a berry-licious tiramisu. Doesn’t that sound lovely? Now I just need another excuse to make a fancy dessert…

Well I’m off to Mt. Hood with a couple of my clients for work now. It’s just a short trip (1 day and one night) and lets hope everything goes smoothly!

xo/Nikita


Wild, Wild West Coast Blackberries

Standard

...

Despite working the same hours and biking the same route as last weekend, my day felt brighter today. Maybe it’s just the sunshine or the heat (we finally hit 90 today!), but I just really was feeling appreciative of and connected to nature. Riding my bike or walking to work gives me a chance to pay attention to things that I miss when I’m driving.  The sights, the sounds, the smells. Sometimes they are really pleasant, sometimes they’re pretty gross. Today smelled like backyard grilling and lilies. And sweat, but that was just me. Like I said, it was hot! Last week smelled like death because of a dead raccoon I passed. Gross? Yes. But… as a CNA and nursing student, I understand life is often gross.
Something I love about Oregon is the overall feeling of wilderness. Trees are everywhere. They reach out to each other across the roads, forming canopies. Their branches like biceps that would crush me in an embrace. Moss is everywhere, climbing the trees and draping them like feathered boas. The moss also threatens to reclaim areas that humans have paved with concrete. People fight it but I like the way it looks: a reminder than mother nature is bigger than we are.
As a child growing up in the midwest, we would pick blackberries at a local park every summer. My mom would turn them into amazing pies if she could pry us away from eating them out of hand. Before I left for Portland, I asked my then fiance if he would go to the park to pick berries with me to make a pie so I could relish my sweet memories one last time. He agreed to, like a good sport and off we went- only to be eaten alive by mosquitos and have nothing but a bowl of tiny, dry berries to prove for it… Little did I know what Oregon had in store for me!
When we arrived here, the first thing I was struck by was the berries! They were everywhere- thorny brambles literally cascading down the walls by the highway, dripping with the biggest, juiciest berries I’d ever seen. And not a mosquito in sight! I’ve since learned this particular variety of berry is an invasive species, but that doesn’t stop them from being delicious. Oregon has other native species, but the Himalayan Blackberry happens to be the easiest to find. I picked the above berries by the side of the road about a block from my apartment.
I’m currently brainstorming and planning a post to commemorate my 2 year Oregon-iversary which will be next week. It’s going to include another Oregon favorite as well- hazelnuts!

Also, if anyone cares to check it out, I opened an Etsy account yesterday. I am making jewelry out of four leaf clovers and other natural items I find. See more here.

.

Hope you are having a beautiful weekend!
xo/ Nikita

Lazy Day and Mexican Lasagna

Standard

...

Hello lovelies! I apologize for taking so long to post again…I have been working a lot and generally feeling exhausted. I do have several posts I’m working on though!
What a long weekend it was for us! Andrew and I both work long hours on weekends, and this one especially full of… tedious and unpleasant extras. Riding my bike to work three days in a row was tiring, especially in the dark after working 12 hours. After attending a 60 year high school reunion. I was kinda excited, curious since I’ve only been out of high school 5 years. Andrew said “That sounds like it will be depressing and boring.” I said “It will be fun! I get to wear a dress!” And… it was boring and depressing. And I was overdressed. As if being in a room full of people 3 to 4 times my age didn’t make me feel out of place enough.
I don’t mean to complain. I am really lucky to be employed at all and generally enjoy my job. Sometimes it’s just lonely… I used to think I was such a loner. Not antisocial, but not especially social. But there’s nothing like moving to the other side of the country away from all your friends and family and then landing one of the few jobs in which you really don’t interact on a normal human level with anybody to make you realize how socially needy I am.
Monday I was completely taking it easy. I had some things that need to be done, such as returning books, mailing things, phone calls. I walked for my errands and did some light yoga. Otherwise I just did as much relaxing as possible. I worked on some jewelry and spent time with Andrew. We watched Breaking Bad and I made Mexican Lasagna. Good, lazy times. Just what we both needed!
I have made many incarnations of Mexican Lasagna and it is one of Andrew’s favorite dishes. This version is vegetarian and gluten-free.

...


...


...

Mexican Lasagna:

Ingredients:

*12 6 inch corn torillas

*2 cups salsa (I use cheapo brands for this, save the fancy stuff for something else)

*1 8 oz can tomato sauce

*1 tablespoon olive oil
*1 cup diced onion

*1/2 red bell pepper, diced

*1 green chile, minced (optional- leave out if you don’t like it hot!)

*1 clove garlic, minced

*1.5 cups cooked pinto or black beans

*2 cups lowfat or fat free cottage cheese

*1 egg
*1-2 cups shredded pepper jack or sharp cheddar cheese
*minced fresh cilantro and green onion for garnish (optional)

Directions:
1. Preheat oven to 400F. Pour 1/2 cup salsa into a large casserole dish, spreading evenly. Combine the cottage cheese with the egg, mixing thoroughly, and set aside.
2. Heat oil in large skillet over medium heat and add the onions, bell and chile pepper, and garlic. Saute until softened. Add the beans, remaining 1.5 cups salsa, and tomato sauce and cook until heated through.

3. Now you are ready to begin layering! Lay 4 torillas on the bottom of your dish, overlapping slightly. Top with 2 cups bean-vegetable mixture, then 1 cup cottage cheese mixture, then 1/2 to 1 cup shredded cheese. Repeat this layering, leaving out the shredded cheese (save it for the final topping). Layer on your last four tortillas, last bean-veggie mixture, and the remaining shredded cheese.

4. Bake uncovered for 35-40 minutes. Let stand at least 15 minutes before cutting for best (neatest!) results! Top with cilantro and sliced green onion if desired.

We ate our fill of this, kept some in the fridge, and put some in the freezer. This weekend I had two freezer meals that I had made already waiting for me to just heat up after work and it was great! I don’t get home until 7:30- 7:45 pm and am covered in sweat after my uphill bike ride home. The last thing I feel like doing is cooking! This way I can get home and heat dinner up while I shower! So much better!

xo/Nikita


Peanut Butter Cookie Dough Dip and NuNaturals Giveaway

Standard

Cookie dough dip!

Who doesn’t love free things? Free samples, free gifts, free coffee and  food during finals week at school… I can’t lie, my ears perk up when I here the word “free” mentioned.
But what about sugar-free? Gluten-free? Dairy and egg-free? Some seek these labels out of necessity, always longing for products that will indeed not taste as though they are free from, or lacking, the ingredient in question. Those who don’t seek these labels tend to be turned off by them, assuming they are simply an inferior product. Simply removing the offending ingredient would produce an inferior product. But a little creativity can go a long way…
I was invited to a party in where I knew the hostess was trying to cut sugar and refined carbs out of her diet. Having a mouth full of sweet teeth myself, I felt that I should create a dish to bring that would be sweet and decadent tasting, but fit into the guidelines of her diet as well as my own views on healthy eating. As I mentioned before, I recently was lucky enough to be a winner in Laura’s blog giveaway for a package of NuNatural Stevia products, and used stevia to sweeten without adding calories or sugar. This dip is sugar-free, gluten-free, dairy-free, and egg-free!
And while we are on the subject of FREE,  I’m happy to announce that you all have a chance to win a package of NuNatural’s Stevia products as well! NuNaturals is letting me give away packages to four lucky readers- those are pretty good odds, since my  young blog doesn’t get a lot of traffic! See the end of this post for details on how to enter!
First, I have to share this recipe… All I can say is you have to trust me. No, you have to try it. The ingredient list sounds weird, I know. I saw some similar recipes circulating around the blog-world months ago and was intrigued but not convinced enough to try it out. This dip is basically like a sweet hummus. Sweet hummus? You say. Why would anyone do such a thing to such a wonderful food? Umm, because it tastes like cookie dough and has the nutritional profile of hummus! You can even eat it by the spoonful and won’t get sick! Not that I’ve ever made myself sick from eating too much cookie dough…
If you aren’t a fan of peanut butter, or are allergic, try using almond, sunflower seed, or cashew butter for a milder but equally delicious variation!
Peanut Butter-Cookie Dough Dip:
*1.5 cup cooked white beans
*1/3 cup peanut butter (I use natural)
*2 teaspoons vanilla
*1 teaspoon cinnamon
*1/4 teaspoon salt
*1 teaspoon rice wine vinegar or lemon juice
*1/4 teaspoon NuNaturals Clear Liquid Stevia ( If not using stevia, try 2-3 tablespoon agave nectar and omit milk)
*1 dropper full NuNaturals Vanilla Stevia
*1 dropper full NuNaturals Cocoa Extract (optional)
*1-2 tablespoons nondairy milk
*1/4 cup cacao nibs (for completely sugar-free dip) or 1/3 cup chocolate chips
Directions:
1.)Simply combine all ingredients except nondairy milk and cacao nibs or chocolate chips in the bowl of food processor and puree until smooth and creamy. Add the milk as needed to achieve desired consistency.
2.) Add the cacao nibs or chocolate chips and pulse briefly, just enough to combine.
3.) If you can resist eating it by the spoonful, serve with crackers and sliced fresh fruit such as bananas and apples. Also makes a great substitute for peanut butter in a peanut-butter-banana sandwich!
Now for the giveaway details:

...

Each of the four winners will receive a bottle of Vanilla Stevia Liquid (so good!)

.

and a box of 50 stevia packets (great for travel!)

.

To enter, simply leave a comment in the comment section telling me what you would like to use stevia for!  (U.S. residents only) If you don’t have a blog, be sure to leave your email address so that I may contact you if you win.
Note: I’m not getting anything for advertising these products, I just was honestly quite impressed with their quality and want to share this with others who are looking for a natural sugar alternative. Some stevia products can have a bitter aftertaste, but I have found these to be truly superior in flavor!
If you aren’t chosen to receive a package, you can still get free samples! (sorry, only for U.S. residents) Go to www.nunaturals.com for more information. Also, if you decide to purchase anything from their website, you can get a  15% discount on your order by entering the promo code BLG930. You even get free shipping to the continental U.S. if you spend $35 or more.
This contest will be open until Thursday at midnight, PST, and I will announce the winner Friday morning. I will notify you by email. What a great way to start the weekend!
Best of luck!
xo/ Nikita

Refreshing Hibiscus Lemonade

Standard

...

I must confess, I used to be a water hater. I grew up drinking Kool-Aid and cream soda. I dropped the sugary drinks when I was about 13 and have been a staunch water drinker ever since. But for some reason lately I’ve been really enjoying beverages with a bit more… oomph? I’m not really fond of juice (too viscous and sweet for me… and it has a lot more sugar and a lot less nutritional value than many people are aware of!), but I do enjoy flavored waters, teas, and the occasional coconut water.  During the day, I drink a lot of green tea, but after about 5 pm I generally cut myself off from caffeine. Iced herbal teas are a great tasting and low calorie alternative to juices.

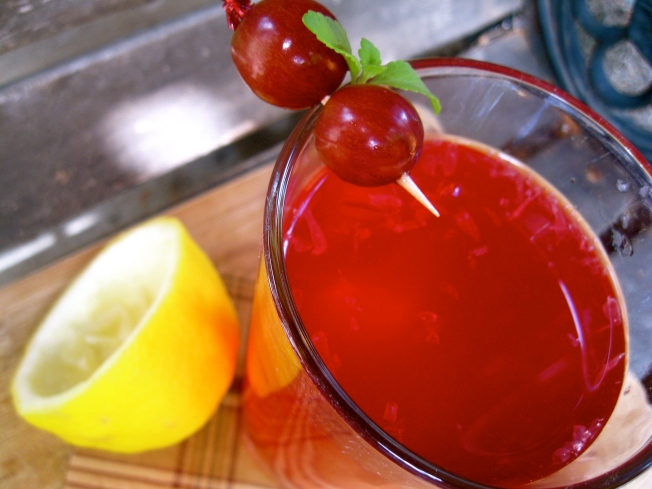
My current obsession? Hibiscus tea! Hibiscus tea is naturally sweet and tart, not to mention it’s natural bright fuchsia coloring makes it lovely to look at. Hibiscus is also rich in vitamin C and a natural coolant for your body. There have even been studies showing that drinking 3 cups of hibiscus tea a day can help lower blood pressure (see a summary of the research from Bastyr University here). I love it when delicious things are good for me!

...

(source)

     Lemonade is a summertime classic, but can often be heavy on the sugar and light on the lemon… not so great for hydration to say the least. My hibiscus lemonade is sweetened with a touch of stevia, a natural and sugar free herb that tastes sweet and makes a great sugar substitute. You could also sweeten with agave and still keep the overall sugar content low because of the natural sweetness of the tea.

...

Refreshing Hibiscus Lemonade:

*4 hibiscus tea bags such as Stash Raspberry Hibiscus Tea (my favorite)

*8 cups pure water

*1/3 cup fresh lemon juice (I used one big, juicy lemon but you may need two if your lemons are smaller)

*scant 1/4 teaspoon pure stevia powder or 6 NuStevia packets OR about 1/4 cup agave nectar

Directions:

1.)Brew the 4 tea bags in 8 cups of pure water, transfer to a large pitcher and chill completely.

2.)Add the fresh lemon juice and stevia powder and stir to mix completely. Pour into a chilly glass with ice and enjoy!

This also makes amazing Arnold Palmers! Just mix equal parts iced green or black tea with the hibiscus lemonade. I haven’t tried it yet, but I’m willing to bet this would also make a great cocktail mixed with a little gin or vodka.

I was lucky enough to win a NuNatural’s stevia package from a giveaway hosted by Laura and have been loving all the amazing stevia products and enjoying replacing the sugar in many favorite recipes. Stay tuned as I hope to host a giveaway here soon so you can try out these products too!

What are some of your favorite summer beverages? Have you used stevia before?

Hope you’ve all been enjoying your weekend! Take care 🙂

xo/ Nikita